Description of "Figure 1-13 Anchor Pane in a Border Pane"
As the window is resized, the nodes maintain their position in the pane according to their anchor points. Figure 1-14 shows how the buttons, which are anchored to the bottom of the pane, move closer to the sales information as the window is made smaller.
Figure 1-14 Resized Anchor Pane
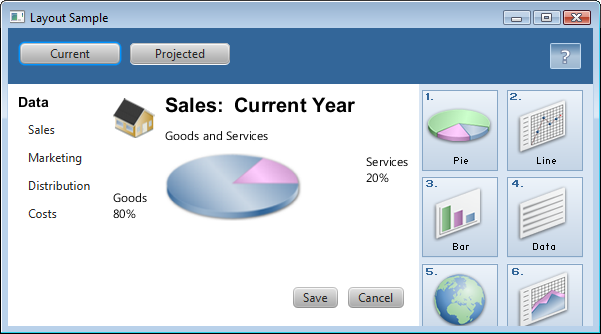
Description of "Figure 1-14 Resized Anchor Pane"
Additional Resources
To learn more about the layout panes in JavaFX, see the information for the javafx.scene.layout package in the API Documentation.
Tips for Sizing and Aligning Nodes
This topic describes techniques for controlling the size and alignment of nodes when placed in a JavaFX layout pane.
A main advantage of using the built-in JavaFX layout panes is that the size and alignment of nodes is handled by the pane. As the pane is resized, the nodes are resized according to their preferred size range preferences. Note that not all node classes are resizable. UI controls and layout panes are resizable, but shapes, Text objects, and Group objects are not resizable and are treated as rigid objects in a layout.
If you want more control over the size of controls in your UI, you can set their preferred size range directly. The layout pane then uses your settings to determine the size of the control. To manage the position of the controls, you can use the alignment properties for the layout panes.
This topic provides simple examples for sizing and aligning nodes in a pane. The LayoutSizingAligning.java file contains the source code for the samples described in this topic. The LayoutSizingAligning.zip file contains the NetBeans IDE project for the sample.
Sizing Nodes
Layouts query the preferred size of their nodes by invoking the prefWidth(height) and prefHeight(width) methods. By default, UI controls compute default values for their preferred size that is based on the content of the control. For example, the computed size of a Button object is determined by the length of the text and the size of the font used for the label, plus the size of any image. Typically, the computed size is just big enough for the control and the label to be fully visible.
UI controls also provide default minimum and maximum sizes that are based on the typical usage of the control. For example, the maximum size of a Button object defaults to its preferred size because you don't usually want buttons to grow arbitrarily large. However, the maximum size of a ScrollPane object is unbounded because typically you do want them to grow to fill their spaces.
You can use the default size constraints of nodes, or you can set them to provide the look that you want. For example, Figure 2-1 shows the default size of several buttons and a list view in a border pane.
Figure 2-1 Computed Sizes
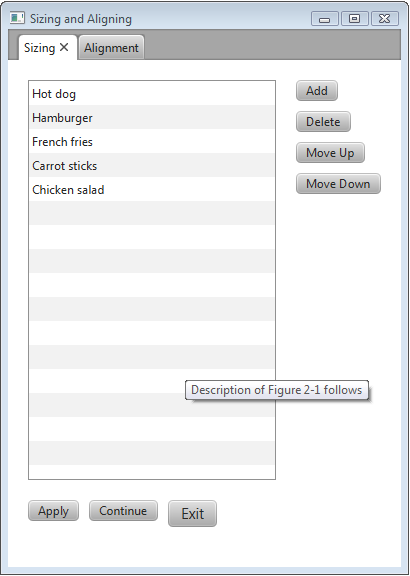
Description of "Figure 2-1 Computed Sizes"
Suppose that the look that you want is the screen shown in Figure 2-2, which shows the UI controls sized according to desired constraints.
Figure 2-2 Desired Sizes

Description of "Figure 2-2 Desired Sizes"
Applications often need to directly set the minimum, preferred, and maximum size constraints on controls. The following sections provide tips for overriding the computed sizes to get the look that you want.